Learn how to generate SSH keys to configure SSH, SFTP, Git or Drupal Drush connection to your AltaGrade hosting account.
Tutorial on how to connect to your AltaGrade server's control panel is located at https://www.altagrade.com/help/control-panel#logging-to-control-panel.
For security reasons we use passwordless SSH, so to start working with your AltaGrade hosting account, first you need to add your public key to it.
SSH
Using the SSH protocol, you can connect to remote servers and services. With SSH keys, you can connect to your AltaGrade servers without supplying your username or password each time.
Check existing SSH keys
Before generating new SSH keys, you can check to see if you have any existing SSH keys to re-use. Perform the following steps on your local computer.
- If you are on a Windows-machine, then install any terminal emulator, for example, Termius for Windows or Putty. If you are on a Linux or MacOS computer, then just open your command-line program like Terminal.
- Enter
ls -al ~/.ssh/*.pubto see if existing SSH keys are present. - Check the directory listing to see if you already have any public SSH keys.
If you have any existing public keys, then your output should be something like
-rw-r--r--@  1 nick  staff     618 Nov 21  2013 id_dsa.pub
-rwxr-xr-x@  1 nick  staff     401 Jan  5  2015 id_rsa.pub
Please note that DSA keys were deprecated in OpenSSH 7.0, so if the above check gave you only the id_dsa.pub key, then we recommend you to generate a new RSA key.
Generate a new SSH Key
If you don't have an existing public and private key pair or do not wish to re-use them for connecting to your AltaGrade server, then generate a new SSH key.
- Open your Terminal
- Run the
ssh-keygen -t rsa -b 4096command and unless you're an advanced user, just press enter for every question. If the command says the key already exists, you can either overwrite it or continue onto the next step with your existing key. - Run the
cat ~/.ssh/id_rsa.pubcommand and copy the output to your clipboard.
Add your key to AltaGrade Dashboard
Now you need to add your public key to AltaGrade Dashboard in order to be able to connect to your hosting account. Please follow these steps to get your public key added and confirmed by AltaGrade Team.
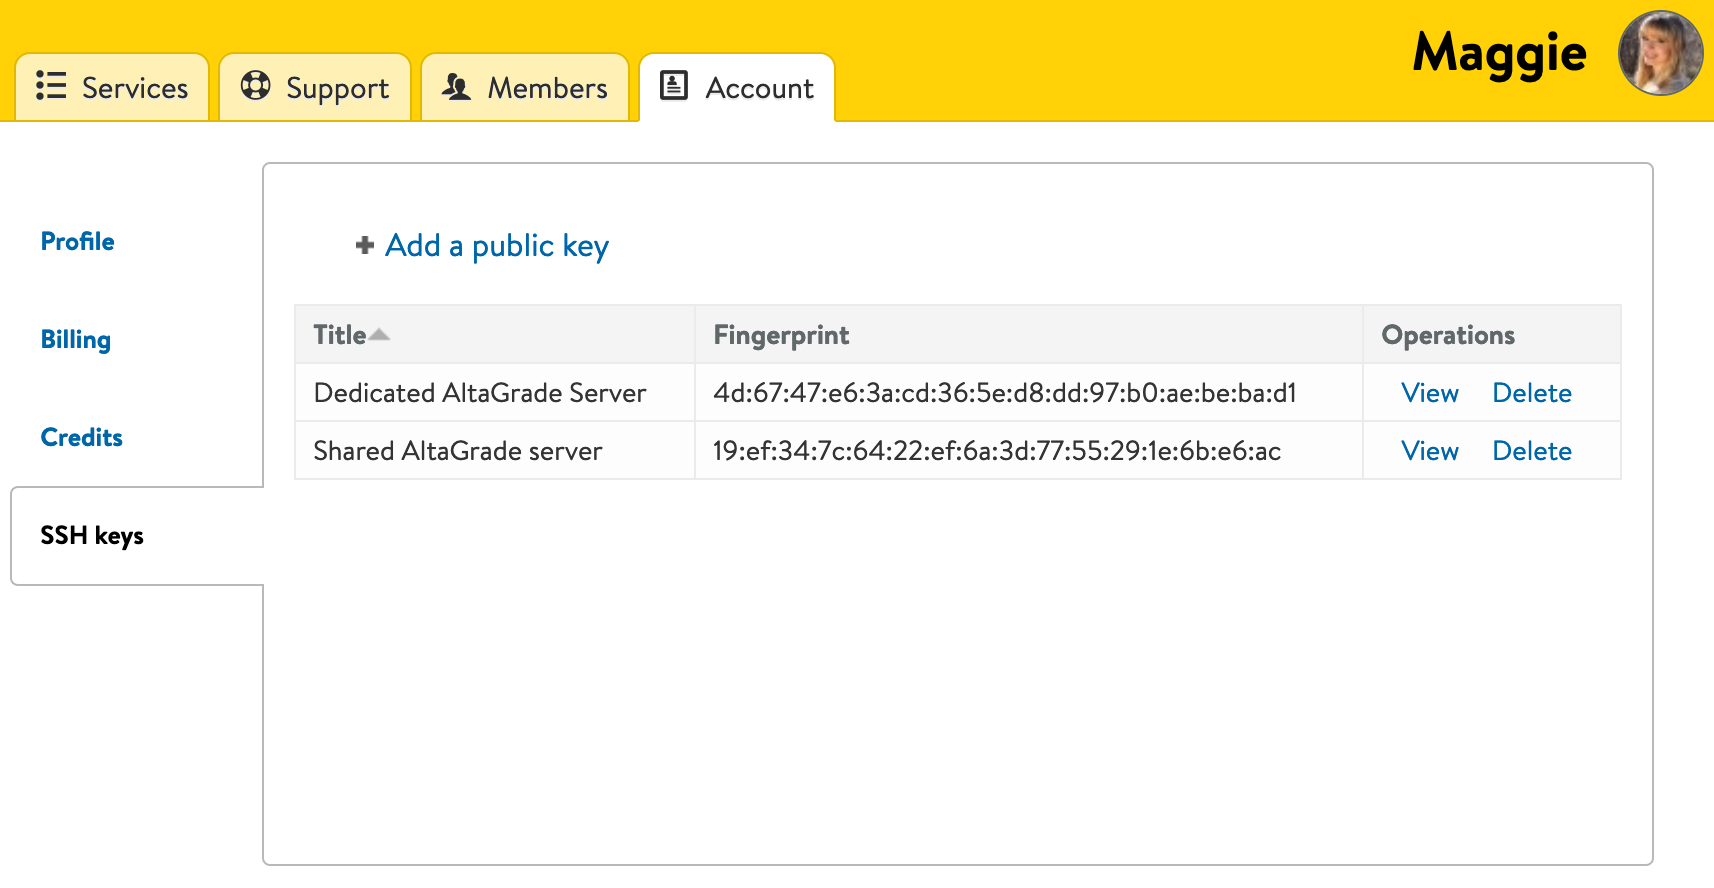
Because one customer can have to multiple number of active servers and because their staff-members can have various access levels, after adding your public key you need to wait for AltaGrade team to verify and perform your request via automatically created tickets.
SSH into your AltaGrade server
Once AltaGrade support team has configured the requested access, run the ssh username@IP -p port command on your terminal and start working with your AltaGrade server remotely.
If you don't know your username, IP and secure port, then find the detailed access information on your AltaGrade Dashboard account.
SFTP
For security reasons, FTP protocol and its port 21 are blocked on all the AltaGrade servers. So if you want to work with your AltaGrade hosting account via FTP, then you can use any FTP client-program that supports SFTP protocol. And since SFTP uses the SSH protocol to establish a secure connection, the same authentication methods are available that are present in SSH.
FileZilla
FileZilla is one of the popular free open source FTP clients that support SFTP.
Download and Install FileZilla
To start working with your AltaGrade hosting account using FileZilla first download and install it on your local machine.
Configure Connection
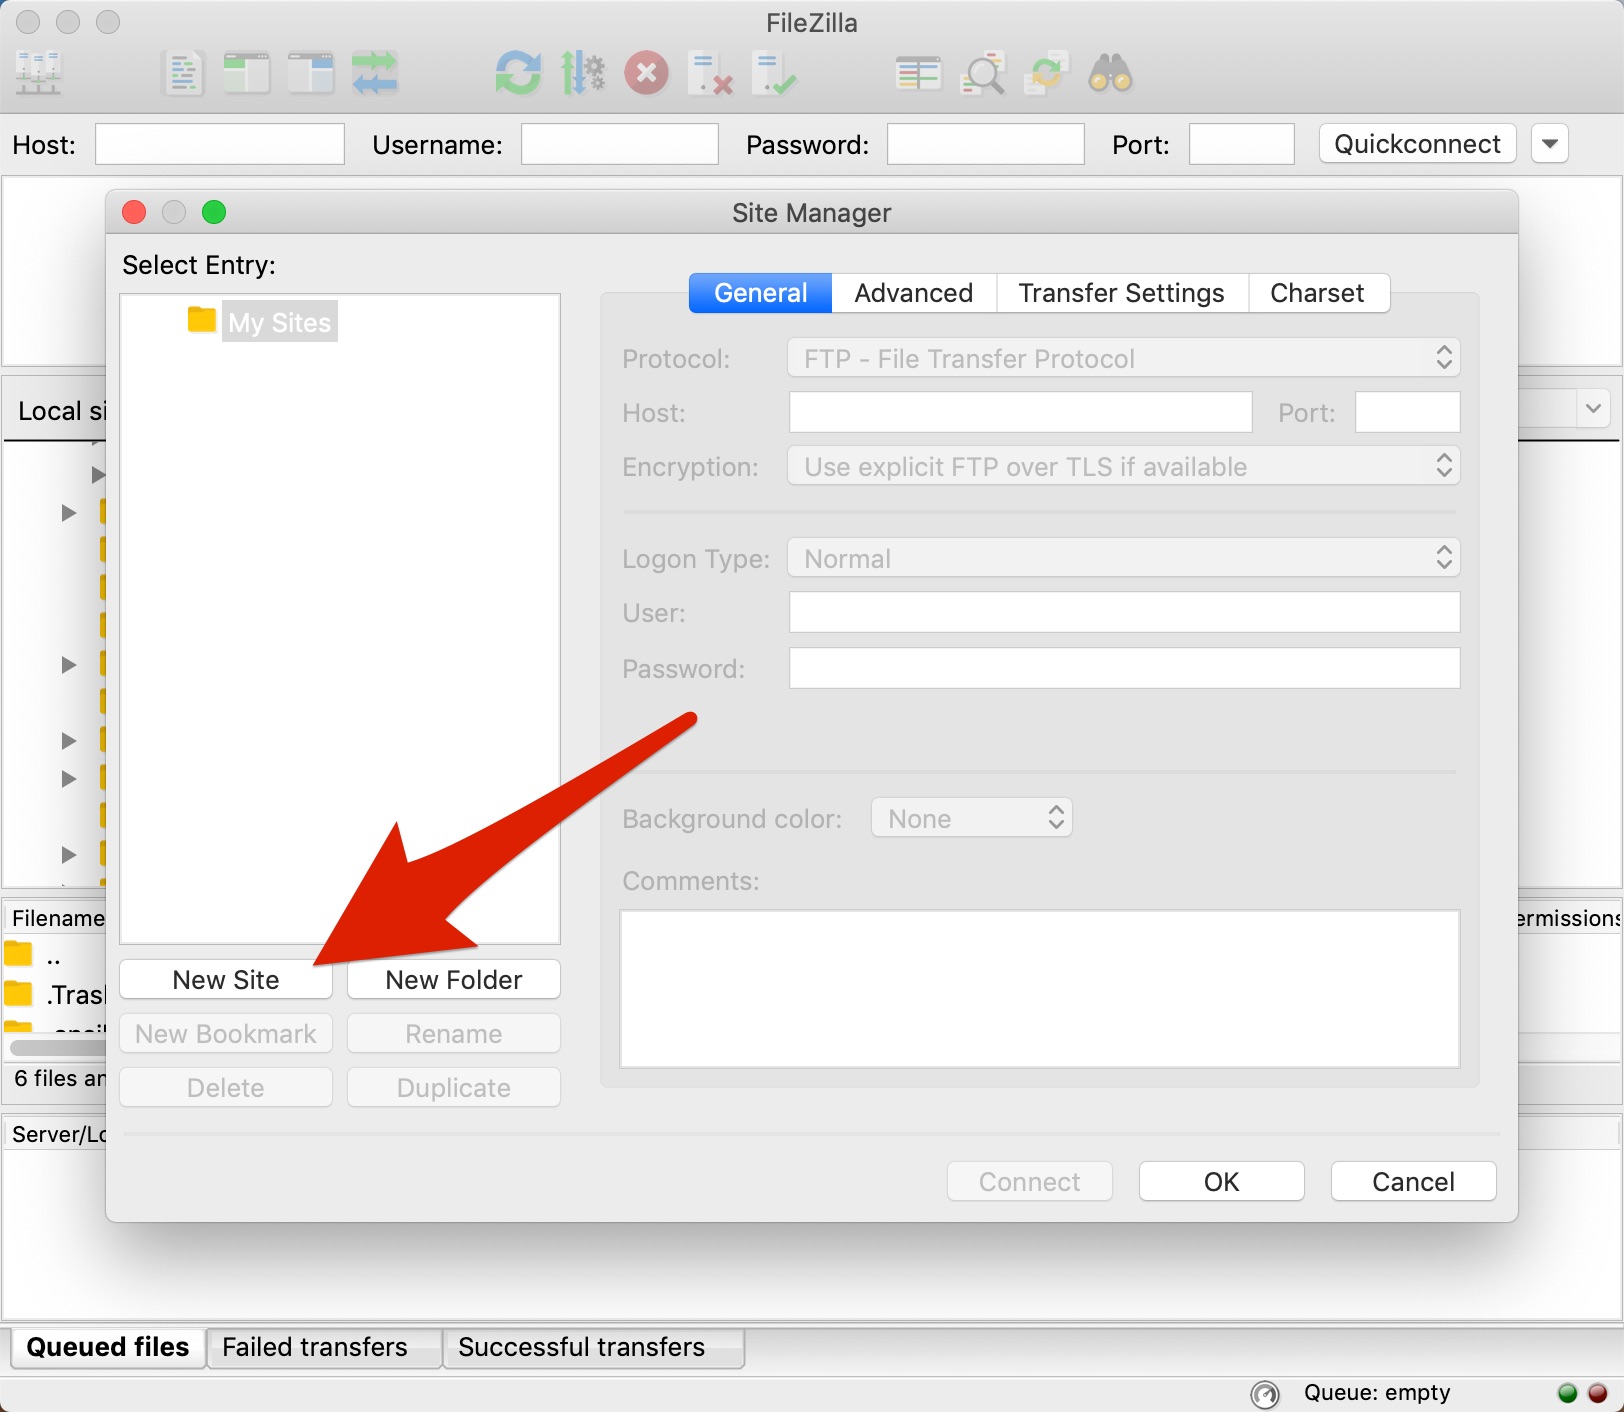
After FileZilla is installed, open it and click on the File > Site Manager, which will open a pop-up window. Click on the New Site button and enter all the connection details.
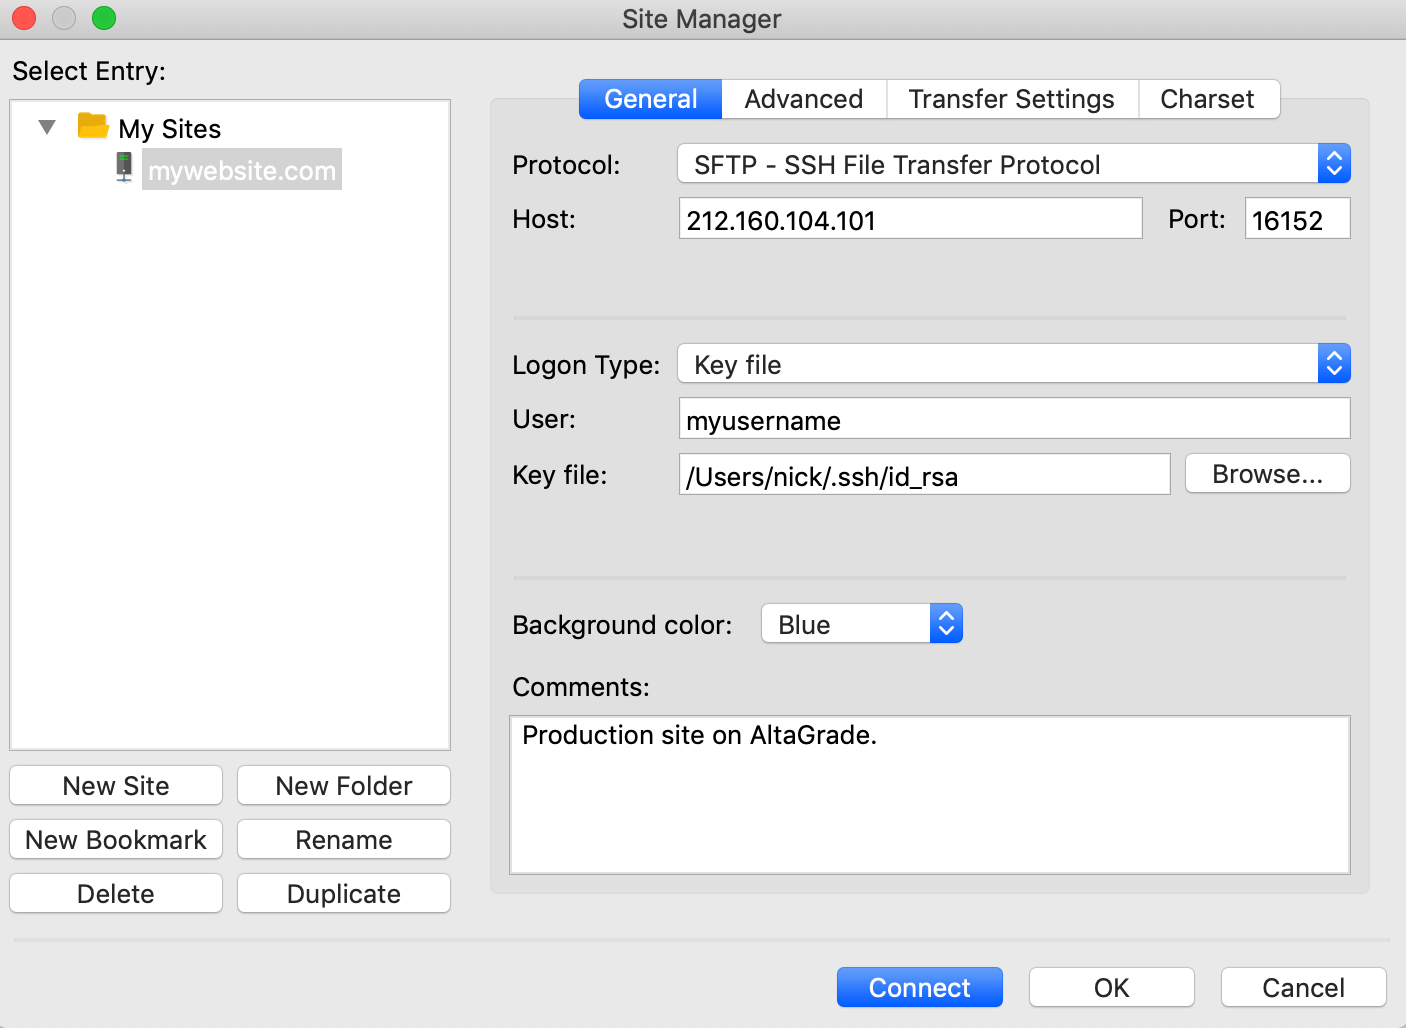
When setting up your FileZilla connection, make sure to choose SFTP protocol and enter your AltaGrade server's IP address and secure port given on your AltaGrade Dashboard.
Furthermore, for the Logon Type field, choose the Key file option, for User field - your AltaGrade master username, and for the Key file field enter the full path to your RSA private key. The filled in pop-up window should look something like:
First time connection
When you click on the Connect button for the first time it will ask if you want to allow saving passwords and since you are going to use secure passwordless connection you may opt with "No" and proceed further.
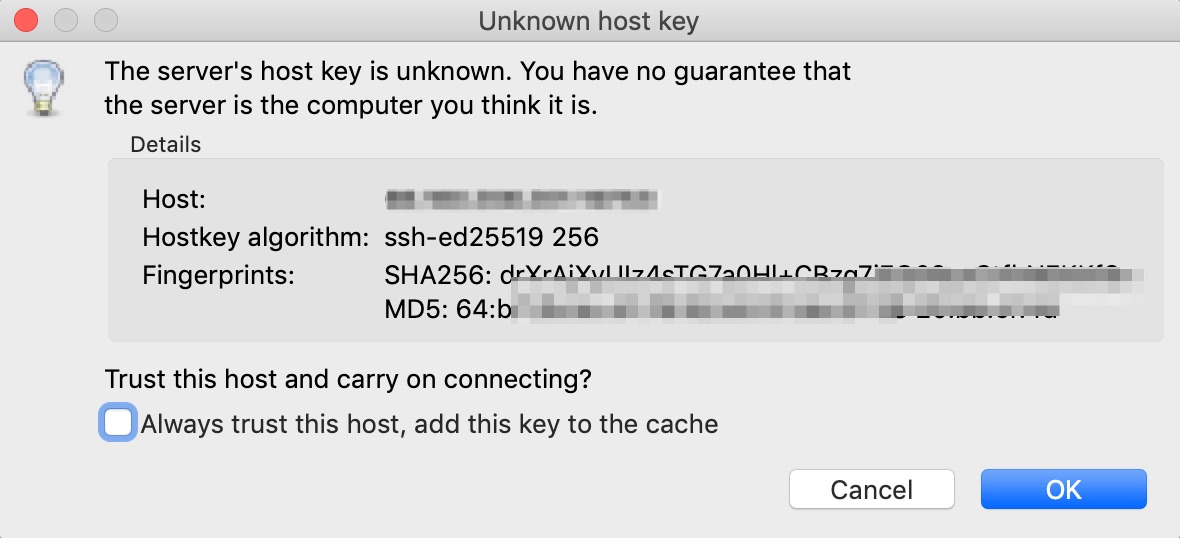
The next window will ask if you want to trust your AltaGrade host and carry on connection. Check on the box next to Always trust this host, add this key to the cache and click on the OK button:
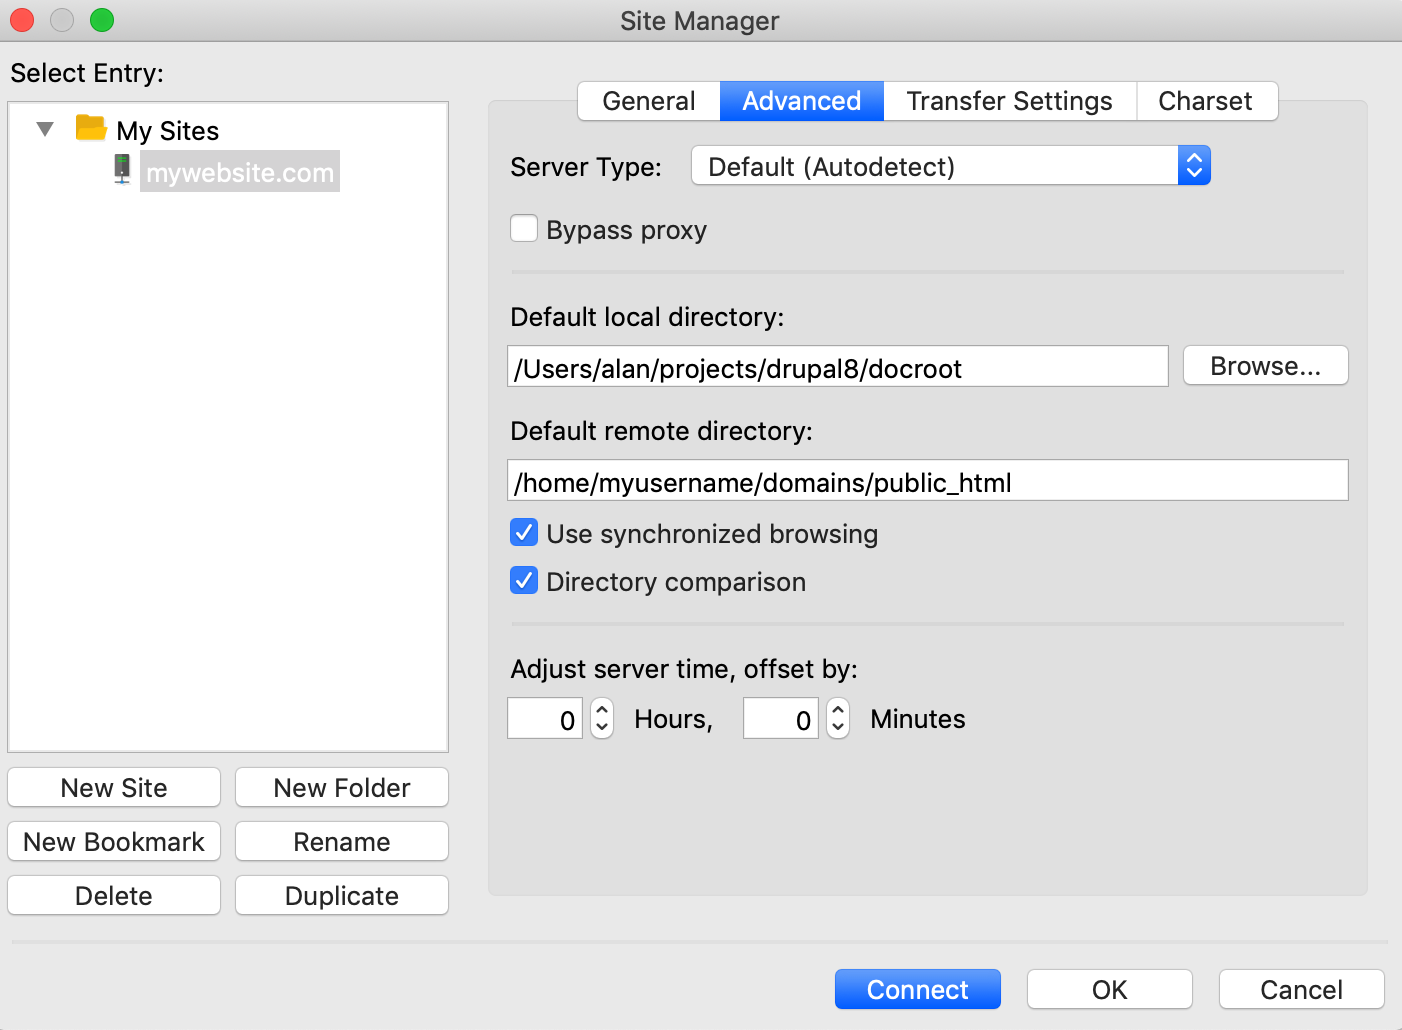
The above steps are sufficient for one-time connections, however if you'd like to be constantly working with a particular website on your AltaGrade hosting account using FileZilla, then you are recommended to configure the default local and remote directories on the advanced settings options:
SCP
If you prefer instead of setting up Git or SFTP to quickly transfer files between your AltaGrade server and any remote host, then you can use another secure tool.
The Secure Copy Protocol (SCP) is a network protocol based on the BSD RCP, which supports file transfers between hosts on a network. SCP allows files to be copied to, from, or between different hosts. It uses SSH for data transfer and provides the same authentication and same level of security as SSH.
SCP files to AltaGrade
To transfer single file or multiple files from your local host (your computer) to your AltaGrade server, you need to use the following command in your Terminal:
scp -P port file-1 file-2 username@IP:/path-to-your-website
To transfer a local directory to your AltaGrade server, you would use the following command:
scp -P port -r local_dir username@IP:/path-to-your-website
SCP files from AltaGrade
To download files or recursively a directory from your AltaGrade server to your local host run the following commands respectively:
scp -P port username@IP:/path-to-your-website local-path
and
scp -P port -r username@IP:/path-to-your-website local-path
Git
Another way to connect to your AltaGrade server is through using Git. Git is a free and open source distributed version control system designed to handle everything from small to very large projects with speed and efficiency. You can find the comprehensive Git documentation on https://git-scm.com.
To connect to your AltaGrade server using Git, you would run the following simple command:
git remote add origin ssh://username@IP:port/path-to-your-git-setup
Please contact us through your AltaGrade Dashboard if you want our help in getting your localhost to connect to your AltaGrade server via Git.
Drush
One of the most convenient ways of working with your AltaGrade server remotely is using Drush and its wonderful option for configuring the aliases for your local and remote Drupal installations.
The name Drush stands for DRUpal SHell. Drush is a command line utility that allows you to communicate with your local and remote Drupal websites.
Drush Documentation
While you can find the extensive Drush documentation on http://docs.drush.org, you can start using the following Drush example aliases file to sync files between your local environment and your AltaGrade server.
Drush Aliases File
Provided you have your local web-server running with Drush installed and assuming your development branch is located on your local computer and the production branch is on your AltaGrade server, just run the command:
nano ~/.drush/mysite.aliases.drushrc.php
and paste the following content:
/**
 * @file yoursite.aliases.drushrc.php
 * Site aliases for [your site domain]
 * Place this file at ~/.drush/  (~/ means your home path)
 *
 * You can copy the site alias configuration of an existing site into a file
 * with the following commands:
 *   $ cd /path/to/settings.php/of/the/site/
 *   $ drush site-alias @self --full --with-optional >> ~/.drush/mysite.aliases.drushrc.php
 * Then edit that file to wrap the code in < ? php ? > tags.
 */

/**
 * Local alias
 * Set the root and site_path values to point to your local site
 */

$aliases['dev'] = array (
  'root' => '/var/www/docroot',
  'uri' => 'mysite.localhost',
  'path-aliases' =>
  array (
    '%drush' => '/usr/local/bin',
    '%sites' => 'sites',
    '%theme' => 'sites/all/themes/altagrade',
    '%custom' => 'sites/all/modules/custom',
  ),
);

$aliases['prod'] = array (
  'uri' => 'my.website.com',
  'root' => '/home/username/domains/my.website.com/public_html',
  'remote-user' => 'username',
  'remote-host' => '120.162.203.101',
  'ssh-options'  => '-p 13583',  // To change the default port on remote server
  'path-aliases' => array(
    '%dump-dir' => '/tmp',
    '%sites' => 'sites',
    '%theme' => 'sites/all/themes/altagrade',
    '%custom' => 'sites/all/modules/custom',
  ),
  'source-command-specific' => array (
    'sql-sync' => array (
      'no-cache' => TRUE,
      'structure-tables-key' => 'common',
    ),
  ),
  // No need to modify the following settings
  'command-specific' => array (
    'sql-sync' => array (
      'sanitize' => TRUE,
      'no-ordered-dump' => TRUE,
      'structure-tables' => array(
       // You can add more tables which contain data to be ignored by the database dump
        'common' => array('cache', 'cache_filter', 'cache_menu', 'cache_page', 'history', 'sessions', 'watchdog'),
      ),
    ),
  ),
);
Usage
To copy the production database to your local site:
drush sql-sync @prod @dev
To copy your local database to the production site:
drush sql-sync @dev @prod --structure-tables-key=common --no-ordered-dump --sanitize=0 --no-cache
To copy all files in production site to your local site:
drush rsync @prod:%files @dev:%files
Clear the cache in production:
drush @prod clear-cache all