Learn how to use Git to deploy a Drupal, Backdrop or WordPress website from your local repository - where you work and develop - to your AltaGrade server - where you keep everything in sync and can work with your team and different machines.
Server-side actions
Note: You can contact us by creating a new ticket on AltaGrade Dashboard and indicating which website you'd like to have Git workflow for and we will promptly configure it for you. In this case, skip this section and proceed directly to Localhost actions.
If you do not intend to be pushing files from your local (on your computer) development branch to production branch (on your AltaGrade server) using Git, then proceed to https://www.altagrade.com/help/control-panel/site-manager#create-domain instead for instructions on how to create Drupal 7, Drupal 8, Drupal 9, Backdrop or Wordpress websites with one click. Otherwise, read further to prepare your production branch.
Create an empty website for production branch
We will be pushing the initial code from local development branch, so we need an empty document root for production branch.
If your website has already been deployed, then Login to Control Panel and empty the public_html directory (document root of your website) using the File Manager. Alternatively, SSH into your AltaGrade server and run the rm -rf /home/username/public_html command.
Otherwise, follow steps on https://www.altagrade.com/help/control-panel/site-manager#create-domain to create a new website, making sure to select either Default Settings or Settings For Sub-Domains in the Domain configuration template field.
Create a git repository
Expand the Services menu and then click on Git Repositories, fill in the form replacing altagrade with the username of your hosting account.
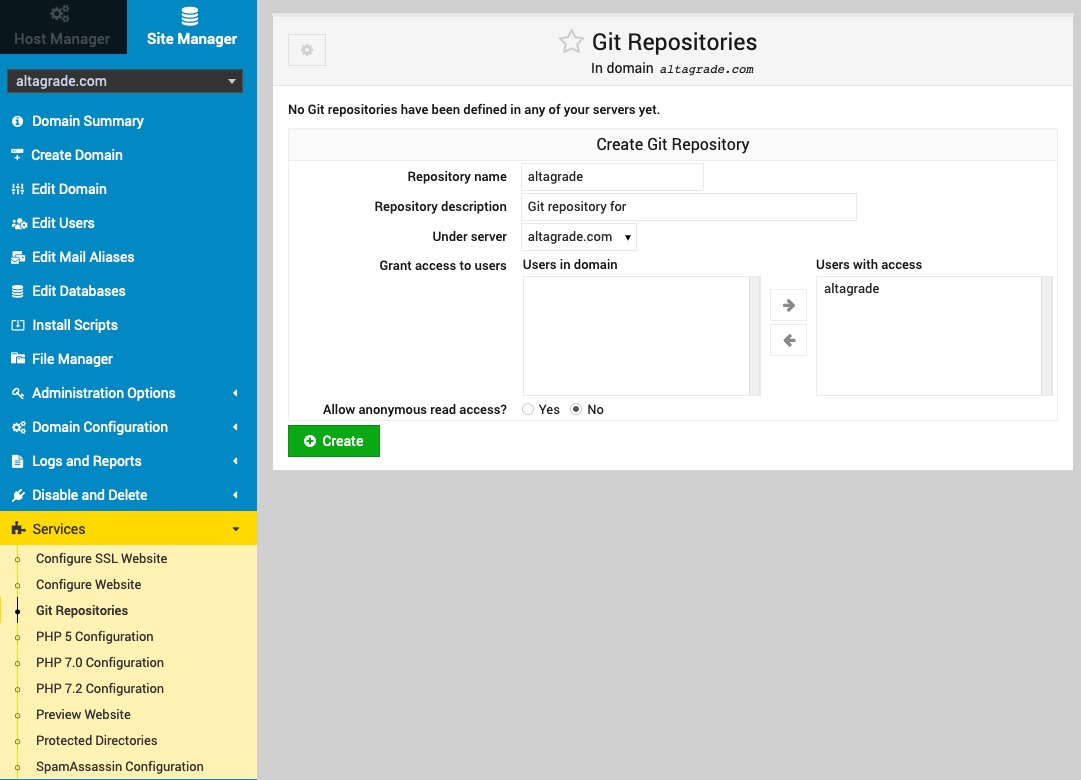
Copy the newly create path to git repository under the Directory tab. You will need it for the next step.
Create post-receive action
Switch to terminal and switch working directory to the hooks sub-directory of the copied git repository. For example:
cd /home/altagrade/public_html/git/altagrade.git/hooks
Use nano post-receive command to open an editor and copy-paste the following code properly replacing the TARGET, GIT_DIR and BRANCH paths:
#!/bin/bash
DOCROOT="/home/altagrade/public_html"
GIT_DIR="/home/altagrade/public_html/git/altagrade.git"
BRANCH="master"

while read oldrev newrev ref
do
	# only checking out the master branch
	if [ "$ref" = "refs/heads/$BRANCH" ];
	then
		echo "Ref $ref received. Deploying ${BRANCH} branch to production..."
		git --work-tree=$DOCROOT --git-dir=$GIT_DIR checkout -f $BRANCH
	else
		echo "Ref $ref received. Doing nothing: only the ${BRANCH} branch may be deployed on this server."
	fi
done
Make the post-receive script executable:
chmod +x post-receive
That's all you need to do on the server-side.
Localhost actions
Make sure passwordless access is established between your localhost (your computer) and your AltaGrade server.
Create local repository
Open your terminal and make sure you are in the document root of your development branch. If you haven't created git repository yet, then run:
git init
git add .
git commit -m "Initial push from dev to prod"
Configure the remote path
To tell git to add a remote called prod run the following command by providing the correct IP address and secure port assigned to your AltaGrade server:
git remote add prod ssh://altagrade@$altagrade_server_IP:$custom_port/home/altagrade/public_html/git/altagrade.git
Run the git remote --verbose command to make sure you have an output like:
prod	ssh://[email protected]:18752/home/altagrade/public_html/git/alt... (fetch)
prod	ssh://[email protected]:18752/home/altagrade/public_html/git/alt... (push)
Push files to production site
And finally push your last commit to the production site by firing up the git push prod master command:
docker@cli:/var/www/docroot$ git push prod master
Counting objects: 3215, done.
Delta compression using up to 3 threads.
Compressing objects: 100% (3106/3106), done.
Writing objects: 100% (3215/3215), 9.72 MiB | 1.39 MiB/s, done.
Total 3215 (delta 349), reused 0 (delta 0)
remote: Ref refs/heads/master received. Deploying master branch to production...
remote: Already on 'master'
To ssh://212.216.129.226:18752/home/drupdrop/public_html/git/altagrade.git

 * [new branch]      master -> master
docker@cli:/var/www/docroot$
Congratulations! Because at this stage you should be able to see the effect of the pushed files on your live website if you open it browser. Note that the configuration files like settings.php are excluded from git operations, so you have to get them generated automatically (e.g., by completing setting up your website via browser) or copied manually.
You can clone your production website and configure the newly created website as another, for example, testing git repository in the similar manner described above.
Browse git repository
You can use a simple web-based CGI visualizer that comes with git to browse and track commits to your prod repository. To do so open your Control Panel, select your production domain name, expand Services menu on the left, click on Git Repositories and then on Browser Repositorya s shown below:

and you will see the user interface for the git repository like:
